“Parkonator”
Historically I have preferred car stereos that look like they actually came with the car. My particular head unit is a Clarion CX609, I like it because it matches the green interior lights of my car (as much as I dislike green as an interior color). However, recently I’ve been keeping an eye out for an Android powered double din head unit. In particular, the Parrot Asteroid Smart, which just looks cool as hell for a variety of reasons.
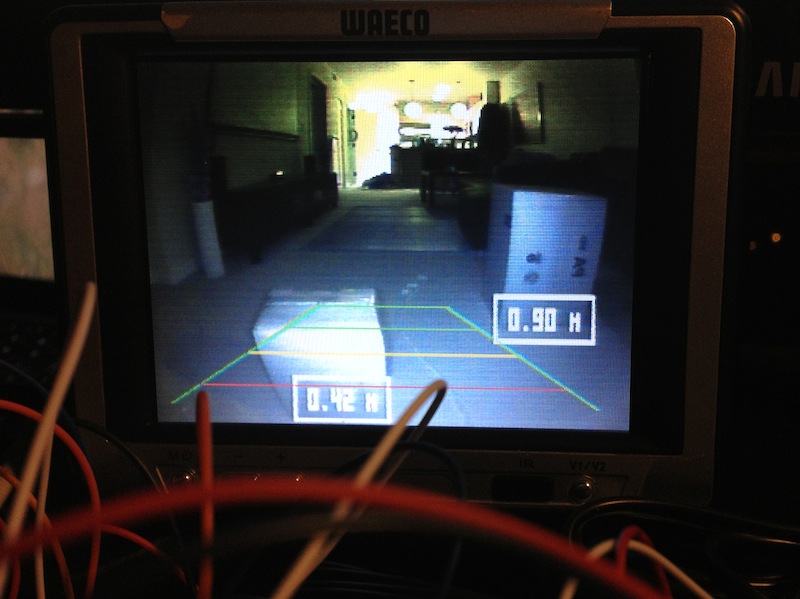
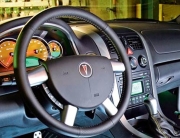
My car (2005 Pontiac GTO) is notoriously hard to see out of, especially when parking. I figured I could use the new stereo’s ability to display video from a reverse camera, and perhaps I could even spice it up a bit.. A few weeks ago I’ve picked up a pair of cheap generic SE4 parking sensors from Amazon. I believe these are very similar to the better known Pyle brand sensors. Using an Arduino, I was able to hack these to overlay parking sensor information on top of a cheap license plate mounted reverse camera. With these tools, the Parkonator project was born!
Components
This project required a few things to work: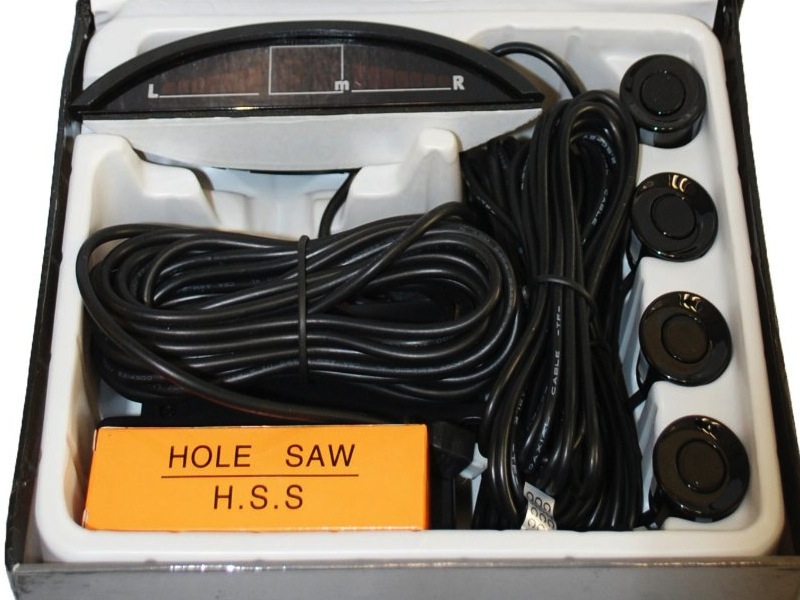
- Arduino UNO R3
- Arduino Mini 04
- Arduino Mini USB Adapter (to program the Mini)
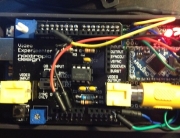
- Video Experimenter shield (by Nootropic Design)
- A cheapo composite license plate mounted reverse camera
- SE4 parking sensor system x 2 (front and rear)
- Some breadboards
Hacking The Parking Sensors
First things first, I had to somehow extract the sensor information from the parking sensor system. Each box arrived with 4 sensors, a controller and a little display that is supposed to show you how far away the things behind you are. On the back of the controller box we had connections for the sensors, power and a connection to the monitor. 
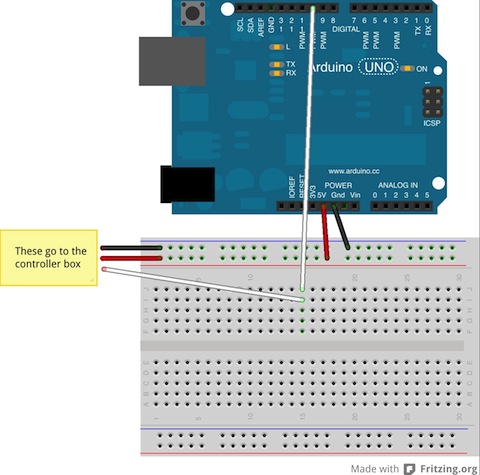
Connection for the monitor consisted of three wires: red, white and black. Can you guess which ones did what? I couldn’t either, so I used a multimeter to measure the voltages. It seems that the red wire is +5v, black is G and the white wire is the signal. This right here told me that the screen is receiving some sort of serial communication from the control box.
I cut the screen connector wire, chucked the screen into the trash and made a neat little breadboard friendly connector using male headers. The nice thing about it is that supplying +5v to the wire allowed the sensor to power the Arduino, or visa versa. Neat. Now to interpret the signal..
Wiring It Up
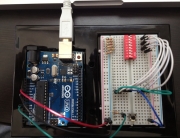
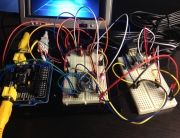
Wiring this thing up to the Arduino is a breeze. Surprizingly, no complicated circuitry is needed. At all. The image below describes the circuit:
Interpreting The Signal
I don’t own an oscilloscope, but I did find this neat article about how you can turn your Arduino into a cheapo wannabe oscilloscope using Processing. Additionally, it appears that someone has already hacked a similar set of sensors for a different project. A lot of work on interpreting the signal goes to Sergei Grichine and his Trackroamer project. Looking at his site and checking with my own ghetto-scope I was able to determine that the set of sensors I’m holding is very similar (though not identical).
In a nutshell, the signal goes like this: there is a long (30 ms) sync pulse, followed by a number of shorter pulses (8µs and 17µs). In my case, I noticed that between sync pulses the sensor sends exactly 16 bits. Converted to bytes, the signal looks like this:
254 255
253 255
128 62
129 61
With a bit of luck and random trial and error I have figured out the following:
- The first number is the sensor ID, minus 128. So if it says 129, the sensor ID is 1 (they start from 0)
- If the ID is above 131 (only values I’ve seen are 252,523,254 and 255) that tells you you can ignore this “packet”
- The second number is the distance reading in centimeters. It goes up all the way to 2.55 meters. However, in my observation, the sensor has a hard time detecting after about 1.5 meters. I’ve got readings up to 1.91 meters max.
Arduino Code
Coding this up wasn’t too much trouble. You’ll notice there’s an example Arduino sketch on the above mentioned Trackroamer site. Obviously though, it doesn’t work for this particular sensor that I had. Also, the track roamer code uses interrupts and I didn’t want to do that because interrupts throw off other things (like serial communication, camera sync, etc). So I decided to just sample the digital pins as fast as I could, which turned out to be fast enough for two sensors.
First, because the code is adapted to two sensor groups (front and rear) we need to define a few things and set up our data structures:
// Input pins
#define REAR_PIN 10
#define FRONT_PIN 11

// Sensor group index constants
#define REAR 0
#define FRONT 1

// Values index constants
#define SENSOR_ID 0
#define SENSOR_VALUE 1

// We expect the packets to be 16 bytes,
// but this defines a large buffer size just in case.
#define MAX_BYTES 80

// Used in place of interrupts to detect change.
unsigned int prevState[2];

// Current pin being sampled
unsigned int currentPin;

// Current state of the switch
unsigned int currentState;

// Whether the particular sensor group value has changed.
boolean changed[2];

// The data (two bytes) for each sensor group.
byte data[2][2];

// Current state for each sensor group (for the switch statement below)
byte state[2];

// Byte index for a particular sensor group
unsigned int index[2];

// Number of bits received for each group
unsigned int count[2];

// This stores the pulse length in microseconds
byte bytes[2][MAX_BYTES];

// Zeroes and ones as they come off the wire
byte rawData[2][MAX_BYTES];

// Last time there was a change on a pin, in milliseconds
unsigned long lastOnChangeMs[2];

// Last time the signal was down on the wire
unsigned long usLastOnChangeDown[2];

// Signal state on the wire
boolean isReversed[2];

// Determines if we should send a dummy packet (more on that later)
unsigned long lastChange;
Set up the pins:
void setup() {
  pinMode(REAR_PIN, INPUT);
  pinMode(FRONT_PIN, INPUT);
  pinMode(DEBUG_PIN, OUTPUT);
}
Add the loop function:
void loop() {
  updateSensorValues();
}
Time to sample the pins for data:
void updateSensorValues() {
  readPins();
  for (int i = 0; i < 2; i++) {
    if (changed[i]) {
      changed[i] = false;
      // Here is where you would send the sensor data. More on that later.
      lastChange = millis();
    }
  }
}
This will loop through both sensor groups and read both digital pins for change:
void readPins() {
  for (int i = 0; i < 2; i++) {
     currentPin = REAR_PIN + i;
     currentState = digitalRead(currentPin);
     if (prevState[i] != currentState) {
       prevState[i] = currentState;
        pinChange(i);
     }
   }
  }
The meat and potatoes of the whole thing. The function below is what collects the bits:
 void pinChange(int pin) {
   unsigned long nowMs;
   unsigned long timespanMs;
   nowMs = millis();
   timespanMs = nowMs - lastOnChangeMs[pin];
   lastOnChangeMs[pin] = nowMs;
   byte parkingSensorValue = prevState[pin];
   if(timespanMs > (unsigned long)30L) {
    isReversed[pin] = parkingSensorValue == 0;
    state[pin] = (byte)1;
  }

  boolean isSignalHigh = isReversed[pin] ? (parkingSensorValue == 0) : (parkingSensorValue == 1);

  switch (state[pin]) {
  case 0:
    break;

  case 1:
    if(!isSignalHigh) {
      state[pin] = (byte)2;
    }
    break;

  case 2:
    if(isSignalHigh) {
      state[pin] = (byte)3;
      index[pin] = 0;
    }
    break;

  case 3:
    {
      unsigned long usNow = micros();
      if(!isSignalHigh) {
        usLastOnChangeDown[pin] = usNow;
      }
      else {
        unsigned long usTimespan = (usNow - usLastOnChangeDown[pin]) >> 4;
        if(usTimespan > (unsigned long)60 || usTimespan < (unsigned long)7) {
           state[pin] = (byte)0;
           index[pin] = 0;
         } else {
           bytes[pin][index[pin]++] = (byte)usTimespan;
           if(index[pin] >= (unsigned int)16)	{
            state[pin] = (byte)4;
          }
        }
      }
    }
    break;

  case 4:
    if(index[pin] == (unsigned int)16) {
      int i;
      boolean goodSample = true;
      count[pin] = (unsigned int)0;
      for (i=0; (unsigned int)i < index[pin] ;i++) {
         if(bytes[pin][i] > (byte)80) {
          goodSample = false;
          break;
        }
        rawData[pin][i] = bytes[pin][i];
      }
      if(goodSample) {
        flashDebugLed();
        count[pin] = index[pin];
        convertdata(pin);
        changed[pin] = data[pin][1] != 254 && data[pin][0] < (128+4);
      }
    }

  default:
    state[pin] = (byte)0;
    index[pin] = 0;
    break;
  }
}
And this converts them to bytes of readable data:
void convertdata(int pin) {
  int i = 0;
  if(count[pin] == (unsigned int)0) {
    while (i < 2) {
      data[pin][i++] = (byte)254;
    }
  }
  else {
    byte bt = 0;
    int cnt = count[pin];
    volatile byte* pbt = data[pin];
    while((unsigned int)i < count[pin]) {
      if(rawData[pin][i] < (byte)12) {
        bt = bt + 1;
      }
      if((i & 0x7) == 0x7) {
        *pbt++ = bt;
        bt = 0;
      }
      bt = bt << 1;
      i++;
    }
    *pbt++ = bt;
  }
}
That’s it! If you’ve done everything correctly, you should be able to see the bits in the “data” array for both sensor groups updating.
Stay tuned for part 2, where I explain how to send this data over to a second Arduino which will be driving the video overlay.





Denny,There IS a bug in the incrementing of the major vsoiern. I’ve fixed it in SVN, but haven’t made a new public release with the fix (one more entry on my list of things to do “sometime”). Since the major vsoiern only updates between migrations, the bug can only manifest itself if there is an issue with the first step of a given migration, but you’re right, there is an issue there. The minor vsoierns (steps within a migration) are double protected: the increment happens second, and the whole thing is wrapped in a CFTRANSACTION. The reason the major vsoiern increments first is for internal bookkeeping reasons. It’s safe for it to increment even if the first migration step fails, because it’ll be minor vsoiern zero (which means the first step is still next in line). The bug was in when the minor vsoiern was reset to zero; it happened at the wrong time before.For the two-developer conflict scenario, there’s nothing the tool can do about it. You have to resolve the conflicts when the second developer commits his/her changes. Migration code does have some ordering ramifications, so resolving a conflict might not be as simple as otherwise (quite possibly requiring manual tweaks to the `schema_version` table), but it’s really no different from any other conflict between multiple developers.
Hello friend , I have a parking sensor, and wanted to read the sender values of the module to the panel display. I know they are 3-wire , negative Black, Red + 5v , and white sign date.
I’m riding a car RPM reading project , and would like to use the parking sensor display to show the engine RPM and the colored lights to show the same rpm of formula 1 cars .
Can you help me ?
I’m not sure I’ll be able to help. I’ve reverse-engineered a cheap chinese parking sensor control board to work with an Arduino. This way I didn’t have to know how to operate the sensor directly.
Hi,
This and the trackroamer projects are great projects that are helping me with a very similar project.
I’m right now trying to decoding the signal from the black box, and going crazy. I have used input pin 3 to capture the signals and microseconds for the signal change and thus the period. A sample set of packets:
Input micro period
0 81056 53780
1 134836 840
0 135676 1460
1 137136 480
0 137616 460
1 138076 476
0 138552 464
1 139016 648
0 139664 524
1 140188 540
0 140728 996
1 141724 524
0 142248 808
1 143056 1104
0 144160 1104
1 145264 1104
0 146368 1108
1 147476 1104
Any idea on decoding this?